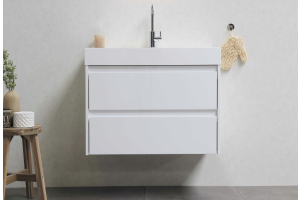
Bringing the vision of your perfect kitchen to life is an exciting opportunity to get creative, make the most of your space, and build the dream life and home that you deserve. In reality, this is often easier said than done. This is particularly true if you have an older or more eclectic-shaped house where standard commercial kitchen cabinet doors struggle to fit in the way you imagined.
There is, however, good news on the horizon. You can still enjoy the kitchen you dreamed of–we’re here to tell you how to do this and how to paint kitchen cabinet doors effectively. With this knowledge, you’ll have full creative control and be able to create a home that is in line with your vision!
Here is information to simplify the process of creating your own perfect kitchen cabinet doors. The first step is to collect the materials, which include:
- Hand saw and miter box
- Sanding block or sander
- Pocket hole kit with micro attachment
- Clamps
- Wood glue
- Kreg screws
- Router
- Chisel
- Hammer
- Circular saw
- Kreg rip-cut guide
- Paintbrushes
- Concealed hinge jig
- Forstener bit
- Cabinet hardware jig
- Plywood cut to the correct measurements
- Stiles and rails cut to size
- one-half-inch square dowels
- Wood filler
- Micro wood plugs
- Primer
- Paint
Once you have gathered your equipment and materials, follow these steps to bring your cabinets to life:
-
BUILD CABINET DOOR FRAMES
Start by building the door frames for your cabinets using a hand saw and miter box. Cut the stiles and rails to the correct size and sand until smooth. Use a pocket hole jig with the micro attachment and drill two pocket holes on the back and at the end of each rail.
Clamp two rails inside two stiles to create the frames, and then glue and screw together. Repeat this process until you have all the corners you need for your frame. -
CREATE THE BACKS OF THE DOOR FRAMES
Once you have the main corners and frame in place, measure a one-half-inch by one-half-inch area across the inner back edge of the frames. Use a chisel and hammer to create a sharp inside square corner on the routed areas.
You can then measure a one-half-inch of plywood for the door insets and use a saw to cut these accurately. -
ADD DOWELS TO THE BACK OF THE DOOR
Place the back side of the doors face up, and glue the plywood boards to the edge of the routed areas. Cut the dowels the same length as the boards, and add them to the top of each. Then, glue them between the ones you have already attached. -
PRIME AND PAINT
Once you have everything in place, the time has come to prime and paint the doors in your preferred color. Make sure you take your time with this process and learn how to paint kitchen cabinet doors properly. Allow each layer of your primer or paint to dry completely before moving on to the next stage. This will create a smooth, professional look for the cabinets. -
ADD THE HINGES
Once the paint is totally dry, it is time to attach the hinges. Place the back of the doors face up, and then measure three inches from the top and bottom of the doors. Clamp the hinges in place, drill the holes, and attach the hinges. -
FILL THE HOLES
Use micro wood plugs to fill in the holes, using a little glue to keep them in place. Once secured, sand for an even surface and use wood filler to fill in spaces around the plugs if needed. -
ATTACH THE HARDWARE
Once everything is in place, it is time to attach the hardware to your cabinets. Drill the holes and screw the handles or pulls on securely, making sure everything is even and straight before handling the cabinets. -
HANG THE CABINETS
Attach the cabinets to the wall by drilling through the back of the cabinets. Screw each securely to the wall, making sure that everything is firmly in place.
FINAL THOUGHTS
Creating your own kitchen cabinets can seem overwhelming. With this simple guide from 27estore, you can create your own custom cabinets that are the perfect fit for your home–in the colors and shades that are the best fit for your preferences and aesthetic!

