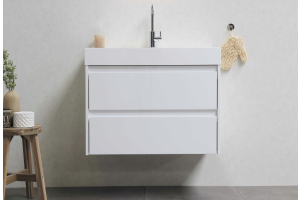
Kitchen cabinets are a key element of your kitchen. They are usually the first thing people notice when they enter your kitchen, and care needs to be taken to ensure that you pick the perfect shape, size, and color. Over time, your cabinets may become tired, dull, and discolored but the prospect of replacing them is both disruptive and costly–which is not enticing in the least.
The good news is that there is an option that will allow you to upgrade the design with modern kitchen cabinet doors without investing in a whole new refit. A lick of paint can help to totally transform the look, feel, and mood of your kitchen.
If you’re not quite ready to learn how to build kitchen cabinet doors, you can at least learn to paint them. To help, we’ve put together a guide on painting kitchen cabinets to bring a new lease of life to them in no time. Read on to get started!
STEPS FOR PAINTING CABINET DOORS
There are a few things you will need:
- Sandpaper
- Primer
- Paint
- Paintbrushes
- Warm, soapy water and a cloth
- Sealant or protective paint
- Screwdriver
Once you have gathered your materials, follow our simple step-by-step guide on how to protect kitchen cabinets with paint and transform your kitchen cabinet doors in no time.
-
REMOVE THE DOORS AND HANDLES
The first step is to remove the doors and hinges from the main body of the cabinet. While you can technically paint the fronts of the doors and then remove them, this tends to be a messier approach because you need to wait for the front of the cabinets to dry completely before doing the backs.
This increases the risk of smudges and fingerprints. Instead, take all doors off the cabinets, remove the handles, and stash them somewhere safe while you are working. -
SAND THE DOORS (OPTIONAL)
If your doors have been painted before, the surface may be bumpy and uneven. This can make it harder for the new paint to adhere properly.
In this case, you can sand the surface of the door with sandpaper to remove any of the old paint and create a smooth, even surface that is easier to work on. This will also help the paint last longer and produce a more professional finish. -
ADD PRIMER
After sanding, load up your paintbrush with primer, and brush the front, back, sides, top, and bottom of the doors. This is important, as the hot and humid nature of kitchens means that in many cases, the paint may not last that long. A good primer can help eliminate this issue, giving the paint a better surface to adhere to.
Once you have applied primer to all the doors, allow them to dry completely before moving on to the next step. Don’t be tempted to rush, or you will end up with marks and streaks where the primer hasn't completely set. -
PAINT THE DOORS
Once the primer is completely dry, you can start painting the doors in your chosen color. We recommend using a paintbrush rather than a roller because this will give you greater control over the paint and usually results in a more natural and even finish.
Start on the large, flat surfaces, and then use a smaller brush for the edges. Let the doors dry by standing them up so air can circulate around them. -
ADD SEALANT, IF NEEDED
If you are using a protective sealant or glaze, add it only when the paint is totally dry. Let the sealant dry thoroughly. -
REATTACH THE HANDLES
We recommend waiting overnight (if possible) before reattaching the handles to ensure the cabinets are dry. Change or upgrade the handles if desired. -
REATTACH THE DOORS
Finally, reattach your doors to the main body of the cabinets and enjoy your stylish new look!
IN SUMMARY
A new set of cabinet doors can be just what your kitchen needs to give it a needed facelift, and the good news is that this can be done without breaking the bank. With a little effort, a touch of paint, and a few do-it-yourself skills, you can transform your cabinets into something brand new. This is a simple project that can totally transform the look, feel, and vibe of your space in no time.
Remember to also keep your new cabinets looking and feeling their best with regular cleaning and dusting. This will help to preserve the paint and leave them looking new for longer!

