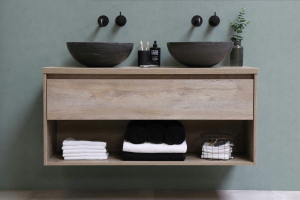
Floating cabinets are a great way to add storage without making your space feel too cramped. Installing them by yourself is fairly simple and can be a fun DIY project as long as you follow the instructions properly–below is a step-by-step guide on hanging floating cabinets at home.
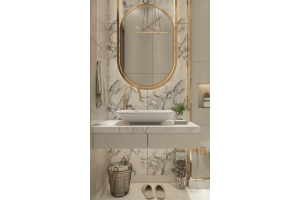
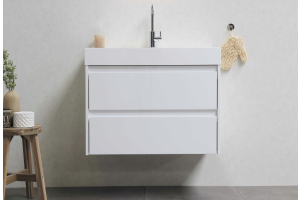
What are floating cabinets? These cabinets hang via wall installation and do not stand on the ground, often allowing for much more space, such as in a small bathroom.
What You’ll Need
Before you begin, gather your supplies. You will need the following:
- A pencil
- Measuring tape
- Masking tape
- Electric drill
- Wall brackets
- Spirit level
- Screws and wall plugs
- Pre-assembled floating cabinet unit
A Step-By-Step Breakdown
If you’re unfamiliar with installing bathroom fixtures, we recommend consulting a professional to prevent mishaps. But if you're confident in your DIY abilities, follow the steps below to spruce up your space with some floating cabinets.
As long as you take proper measurements and use the right tools, you’ll be good to go. The overall installation shouldn’t take more than one or two hours.
Step 1: Preparing
Before you begin the actual installation process, make sure to do some necessary preparation. For instance, you should ensure that the section of the wall you have chosen to install your cabinet is sturdy enough to hold its weight.
Also, be sure to remove any old fixtures and steer clear of any electric lines or plumbing pipes–you don’t want to end up drilling through a water supply line and flooding your entire room!
In the case of drywall, use a cable detector or a pipe to determine whether there is a cavity in the wall. Once you’ve thoroughly checked the area, collect all the necessary tools for the job. Make sure the cabinet unit also has wall brackets alongside.
If the cabinet doors are coming in the way of your installation, consider removing them for easier handling. Once the fixture is in place, you can screw the doors back on.
Step 2: Measuring
Once you’ve ensured the wall space is sturdy, durable, and has no internal fittings, it’s time to measure and mark up the spot. For instance, if you are installing a cabinet above your vanity unit, make sure you place it right above the center of the sink. While taking measurements may be a painstaking process, this is very important.
Make sure to be extra careful when marking up the space–if you miscalculate in this step, you’ll have to redo the entire process later.
Start by marking the middle point of the cabinet on the wall beside the vanity unit. Draw a line out to the point where you wish to install the cabinet. To prevent errors, double-check by placing the cabinet against the wall to see whether it coincides with the center point.
Next, extend the center line, beginning from the cabinet level, down to the edge of the vanity unit. Repeat this process at the back of the cabinet. Also, measure the distance from the top end of the cabinet to the embedded wall fixings–we recommend using a spirit level for the best possible accuracy.
Step 3: Drilling
Drilling holes is the most straightforward step of the project, as long as you have the right tools and accurate measurements. However, make sure to take all safety precautions when drilling holes.
Drilling becomes more complicated if you’re installing cabinets on a tiled wall. The issue with glossy tiles is that they offer very little friction, making the drill skid as soon as you begin drilling. To solve this problem, try placing some masking tape over the drilling spot. As it has a rougher surface, the drill should work just fine.
Make sure not to drill too long or hard–the drill holes should be exactly the size of the wall plugs. Push in the wall plugs, hold down the wall brackets in the front, and securely fasten them using screws.
Step 4: Installing the Cabinet Unit
Once the wall brackets are in place, it’s time to hang your floating cabinets. Lower the cabinet unit carefully on the lined fixings and gently slot it into place. Before you fix it, make sure to double-check the positioning and level using your spirit level and measuring tape.
Once you’re satisfied that everything is set perfectly in place, screw down the fixings from the inside of the cabinet. Now, you can move on to the final steps. If you removed the cabinet doors, reinstall them and pop on the cover caps. Erase any visible pencil markings from the walls and the cabinet, and you’re done!
In Summary
Of course, reading instructions can be a bit confusing. Once you've read this guide, we recommend watching a YouTube video on the topic for better understanding.
If you’re a fan of floating fixtures and want to optimize your bathroom space even further, be sure to check out our post on floating vanities in the bathroom!